How to warm up properly for Olympic Lifting
Warming up is not sexy. If you check the [insert social media platform] of your favorite athlete, you’re likely to find a highlight reel of their fastest times


Warming up is not sexy. If you check the [insert social media platform] of your favorite athlete, you’re likely to find a highlight reel of their fastest times
Warming up is not sexy.
If you check the [insert social media platform] of your favorite athlete, you’re likely to find a highlight reel of their fastest times, farthest throws, or heaviest lifts.
Naturally, we want to put our successes on exhibit for the world, but what the audience rarely sees and therefore, rarely values is the ritual which preceded that PR or milestone.
Even though warming up can sometimes be uneventful or even monotonous, the truth is if you want to get under heavy barbells you have to prepare your body.
In this guide we will explore why warm ups are worth your time and how to use them to enhance your Olympic lifting.
Physiologically speaking, warming up increases blood flow and body temperature which minimizes stress on your joints, tendons, and muscles. This drastically reduces the risk of injury by improving your flexibility, allowing you to move suddenly or explosively, and to bear load.
From a psychological or emotional perspective, warming up helps you keep focused and motivated for the task at hand. It can also help to avoid injury by drawing your attention to any pre-existing pains, or discomfort you may have developed before training.
Besides all those benefits, warming up simply gives you the push needed for you to start your work out.
It’s not overwhelming, it doesn’t require a lot of thought, and it doesn’t have to be complicated.
Even on the days that you dread training, just start moving! In doing so, by the time you’ve gotten your body temperature up, you’ll probably have had a change of heart.
In few words, it depends. What your mobility looks like, what positions you’ll need to get into, and the type of training you’ll be doing will all influence what your warm up should consist of.
Optimal preparation is individualized and is something that you will learn over time. As you accumulate more experience, you’ll learn about your tendencies and know what to prioritize in your warm up.
For now, let’s follow a general chain of command: get warm → get ready → get on the bar.
Our main objective is to get our body temperature and heart rate up.
It can be as simple as running, biking, jumping rope, or rowing and an easy pace.
Gradually increase intensity and focus on steady breathing and good movement patterns.
Eventually you'll start to feel comfortable operating with an elevated heart rate and your body will feel more responsive.
You will have reached your goal when your muscles feel more pliable and you’ve worked up a light sweat.
This can take anywhere from 3-10 minutes.
At this point you can add some light foam rolling to address muscle stiffness however limit your time to a maximum of 30 seconds per zone.
Remember, we want quick-to-respond muscles so it’s important not to overwork the fascia.
Another option is to incorporate plyometrics for further activation.
Olympic lifts go hand in hand with explosiveness. Including high box jumps, depth jumps, or even squat jumps before your session can help to increase power output and prepare your joints.
In this part of the warm up, we use dynamic stretches and banded movements, to optimize our range of motion.
In functional training and Olympic lifting a snatch is moving a barbell in one movement from ground to overhead. If you haven't done it before, or if you’re looking to improve your snatch, check out our guide!
Both the start and the catch position of the snatch (AKA the overhead squat) can be anything but comfortable for those who have ankle, hip, and/or shoulder restrictions. Let’s address some of these restrictions so that we can facilitate getting into and loading these positions.
Some common limitations include thoracic extension, shoulder stability, and hip & ankle mobility.
Giving some special attention to prepare these areas will help us to enter overhead squat quickly while being able to stabilize the bar.
Aim for 2-4 sets of the following:
Target: Mid back mobility
Come to a lunge position with the knee closest to the wall up, and your arms extended in front of you.
Raise the arm closest to the wall up by your ear and begin to twist and rotate your shoulder until your palms and chest are face to face with the wall.
Return by rotating your shoulder and undoing the twist so that your hands and chest point in the same direction as your knee. Complete 8-12 rotations per side.
Target: Glute-hamstring activation and hip & ankle mobility
Take a wider than shoulder width stance.
Turn your feet out about 30-40 degrees. Initiate a squat towards the left side by driving your hips back and bending the left knee.
As you descend, straighten the right leg, and point your right foot towards the ceiling as the left heel stays planted on the floor.
Keep a vertical chest by extending through your mid-back. Hold for about three seconds before standing and descending on the other side. Do 5-8 fluid repetitions each side.
Target: Shoulder activation
With a PVC pipe (wooden dowel or broomstick work in a pinch), stand with your feet hip with apart while maintaining a neutral spine.
Take the pipe with your snatch grip and create tension by “pulling it apart”.
Bring the pipe up and over your head allowing it to pass through smoothly until it reaches your low back. After about five reps, narrow your grip slightly and repeat the process until the PVC arrives overhead but you can no longer complete the full rotation.
Once you have found this sticking point, hold it for 5-10 seconds while keeping your shoulder blades back and down. Create space by pulling apart the PVC again and breathing deeply.
Return to start position and repeat.
We’ll focus on core strength, front rack mobility, and again, shoulder stability.
In the clean and jerk the bar must be received at the shoulders before it is then lifted overhead. Like the snatch, the positions of the clean and jerk can be a challenge for some lifters especially given that it is performed in two parts and uses a heavier load. A strong clean will set the tone for a successful jerk, so it’s important to prepare for both parts of the lift (but again, we also have a guide for that!).
Incorporating some of these drills into your warm up will help to address these issues.
Work towards 2-4 sets of the following:
Target: Trunk stability and core bracing
Lay on the floor face up with your hands extended toward the ceiling. Bring your legs up to 90 degrees so that your shins are parallel to the ground.

Press your lower back into the floor by squeezing your glutes and rotating your pelvis towards your ribcage.
Initiate the exercise by extending the left leg out and the right arm back by your ear. Return to the initial position before repeating on the other side. Keep your lower back pressed into the floor throughout the exercise. Perform 5-8 reps each side.
Target: Lats & mid back mobility
Come to a kneeling position and set your elbows on a box or bench holding the PVC pipe with your palms facing towards you.
Tighten you core and drop your chest towards the ground, bringing your head below your biceps.
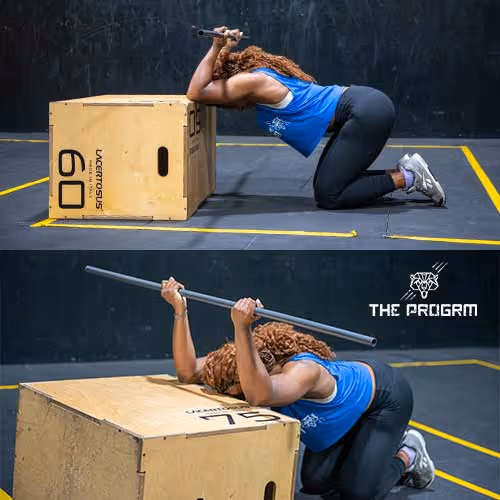
Keep your elbows in as close as possible as you lower your hands towards your upper back, maintaining your hands inline or outside of your elbows. Focus on extending through your mid back as you raise and lower your forearms to control the intensity of the stretch.
Stay here for 30 seconds.
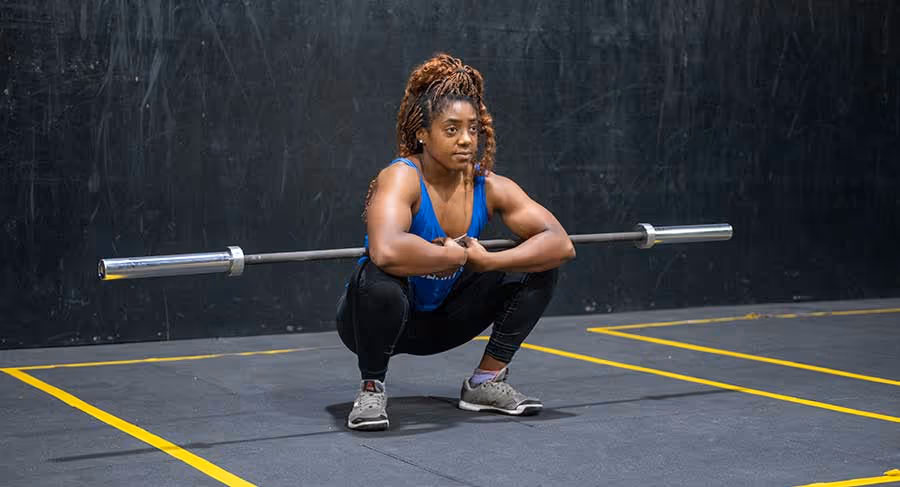
Target: Hip, glute & ham activation
Set your feet in a squat stance and hinge at the hips to grab your toes with a straight back. Hold for three seconds.
Keeping your arms inside your knees, pull your chest up and drop your hips down into a deep squat.
Use your elbows too keep your knees pushed out. Hold for three seconds.
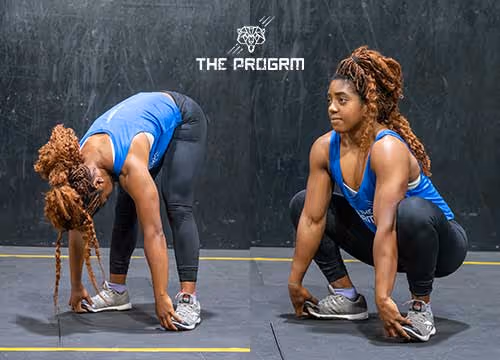
Use the left hand to grab the right ankle and twist towards your right knee extending the right arm overhead. Hold for three seconds before grabbing the left ankle and twisting to the other side.
Return your hands under your toes and drive your hips up and your chest towards your thighs to return to the first position.
Complete 5 to 8 reps.
Target: Thoracic extension, glute activation, shoulder rotation & stability:
Begin seated with your feet on the floor hip width apart. Place your hands on the floor with wrists right under your shoulders and fingertips pointed back.
Keep your glutes strong as you lift them off the floor.

As you extend your hips, reach one arm up and over pointing your chest towards the ground. Return to seated and repeat on the other side.
Go for 6-8 reaches each side.
As mentioned earlier, as you gain more experience training the lifts, you'll develop a better awareness of specific issues that you need to address such as tight hips, weak elbow lockout, or poor ham-glute activation.
If you're truly fortunate, you probably have lifting coach that won't let you forget what your weaknesses are.
We’re warm, we’re prepared, and now it’s time to get acquainted with the bar. This is where the warm up gets more specific according to what you’ll be training.
There is no better way to prepare for a lift than by performing it. Using an empty barbell, go over all the positions you’ll go through during your lifts. Aside from being a sport-specific warm up, this is an excellent way of reinforcing good mechanics and timing of the lift.
Here is an empty bar progression for the snatch.
Perform at least two sets of 3-5 reps of each movement.
S. DEADLIFT → HIGH HANG MUSCLE SNATCH → S. PRESS B/NECK → OVERHEAD SQUAT → SNATCH
BALANCE
Here we have a similar progression but for clean and jerk. Again, go for a minimum of two sets of three to five reps of each movement focusing on proper mechanics, extension, and explosiveness.
DEADLIFT → HIGH HANG MUSCLE CLEAN → FRONT SQUAT → PUSH PRESS → PRESS B/NECK
Once we’ve gone through the motions, it’s not necessarily time to load the bar just yet.
Take advantage of the empty bar to do a few slow reps of your first lift. Manipulating the tempo has the added benefit of exposing bad habits and gives the lifter the chance to correct or refine faults before working up to challenging weights.
When the movement quality is satisfactory, perform some reps at regular speed.
Try to retain the same explosiveness in each lift as you gradually increase weight.
Cooling down after a workout is highly understated but equally as valuable as warming up. Just as warming up improves muscle and joint function, an adequate cool down optimizes their recovery.
Both allow you to work at higher intensities and with heavier loads while reducing risk of injury.
It can be very tempting to skip the cool down. I get it, you have so many other things to do outside of the gym however, remember that cooling down helps to reduce soreness (in turn, making your outside-of-the-gym life a lot easier).
Besides, think of it as an opportunity to reflect on your training session or socialize while making mobility gains.
A standard cool down can be completed within 10 minutes consisting of low intensity cardio (row,bike, run) followed by muscle tissue massage and static stretching. If you can make more of a time commitment, foam roll and stretch each major zone from head to toe, holding stretches for about two minutes.
Final Thoughts
Warming up improves your ability to apply intensity and optimal positioning to your Olympic weightlifting training.
Even though they are often unfeatured parts of training, both warming up and cooling down before and after a session respectively are crucial to ensure improvement and long-term success.
Hip circles and PVC passthroughs may not get likes, but they do get results!

.avif)