The Ultimate Guide to GHD Sit-Ups
Learn how to perform GHD sit-ups safely, improve core strength, and optimize your workout with our comprehensive guide.


Learn how to perform GHD sit-ups safely, improve core strength, and optimize your workout with our comprehensive guide.
The Glute Ham Developer, or GHD, is a versatile piece of equipment often found in functional fitness gyms.
While originally designed to target the glutes and hamstrings, it’s also widely used for a very specific, and effective, core movement: the GHD sit-up.
In this context, the GHD sit-up focuses more on the anterior chain, primarily your abdominal muscles and hip flexors, rather than the posterior chain for which the machine was originally intended.
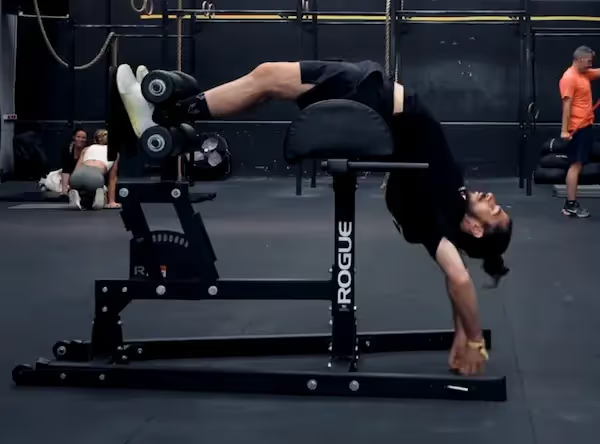
Unlike a standard sit-up performed on the floor, the GHD sit-up allows the torso to travel beyond the horizontal plane.
This deeper range of motion means a more intense stretch through the abdominal muscles and a stronger contraction on the return.
It also requires more control, mainly through the lower back, which can take some time to improve.
They also engage stabilising muscles in the spine and core, making them more demanding and more rewarding than conventional ab exercises.
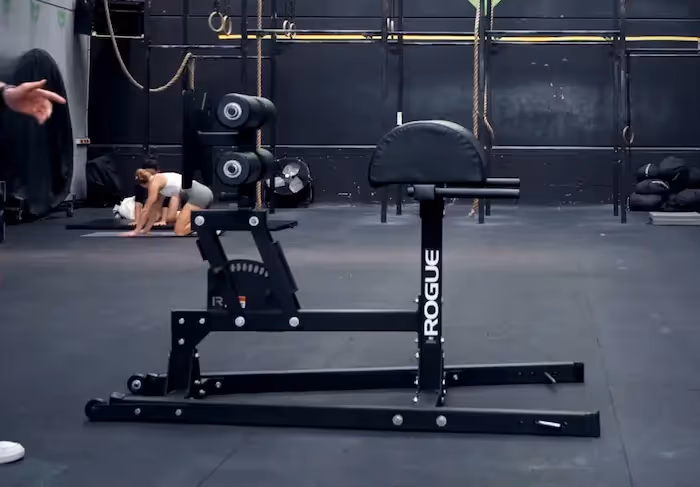
Getting the settings right is key:
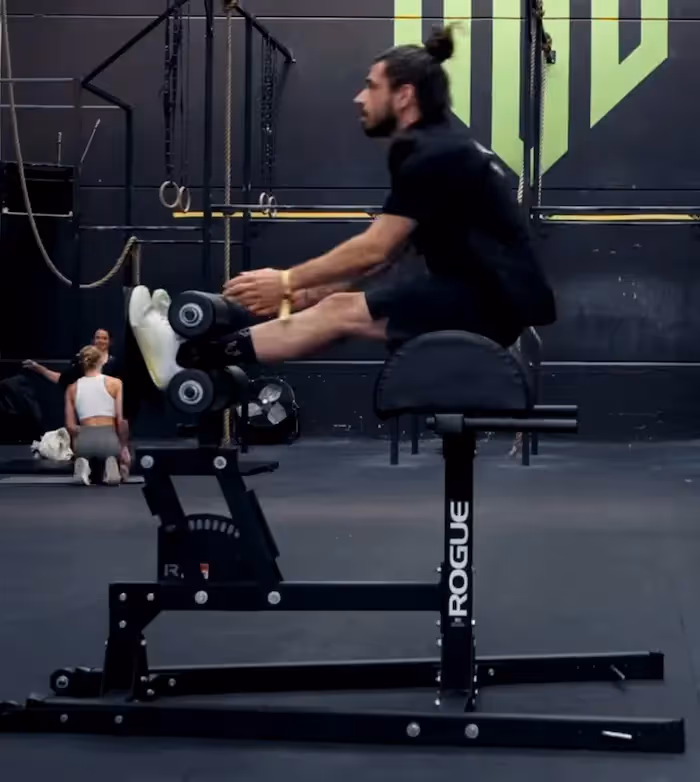
Sit on the hip pad, with your feet secured snugly under the footplate. Make sure your hips are just off the back edge of the pad so you can fully extend. Start upright with your spine in a neutral position and core engaged.
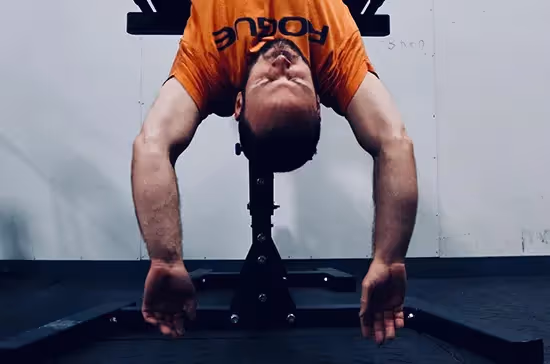
Lower yourself back slowly, extending past the horizontal plane until your hands touch the floor (or just behind you).
Keep the movement controlled: no flopping!
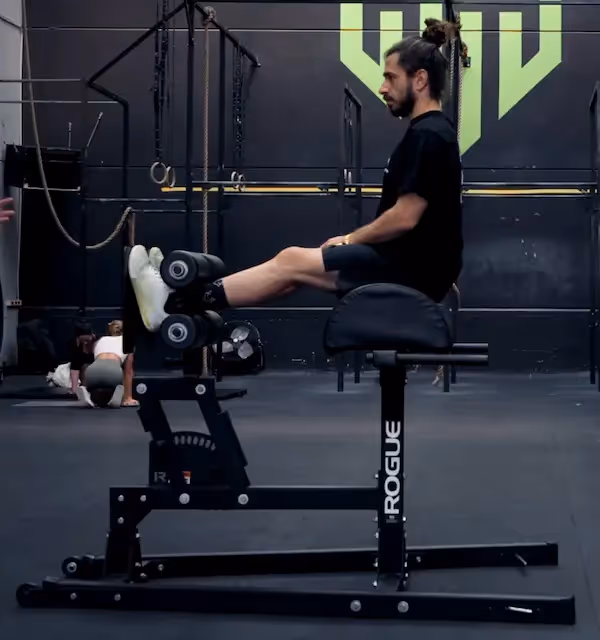
Engage the core and drive yourself back up, aiming to finish tall and upright. Touch the footpad at the top if you’re working to CrossFit standards.
In CrossFit, the movement is often judged by two contact points:
Most athletes will want to start somewhere in the middle. Not too much stretch (which can be uncomfortable and risky) and not too bunched up (which limits range of motion). Find the setting that challenges you just enough without compromising form.
One common error is going too far into extension, especially when feeling confident. This can strain your lower back and cause soreness.
Tip: Keep the movement controlled and go as far as your mobility and strength allow.
If your hips are too far forward on the pad, you'll limit your range. Too far back, and you risk overexposure of the lumbar spine.
Tip: Set the machine so your hips are just off the curve of the pad and your feet are tightly secured.
This isn’t a free fall: dropping back too quickly can lead to injury.
Tip: Think slow and smooth on the way down, and powerful and controlled on the way up.
Where you place your arms affects how hard the movement feels:
Some athletes use a subtle arm swing to help return to the top. It’s not cheating: it’s efficient, as long as you’re not flinging yourself around like a rag doll. Focus on coordination and control.
Once or twice a week is sufficient, especially when starting out. Avoid overdoing it to prevent injury and overtraining.
Prioritize quality over quantity. Focus on proper technique before increasing reps or sets. Gradually add volume over time to allow your core to strengthen safely.
Rules may vary between competitions. Always check the specific standards beforehand regarding arm position, range of motion, and rep speed.
The GHD sit-up isn’t just another ab exercise — it’s a full-core challenge that builds strength, control, and serious resilience. From setup to execution, every element matters.
Start with smart progressions, control the reps, and adjust your footplate position until you find your optimal challenge zone.
With a bit of practice, the GHD machine will become a powerful tool in your fitness arsenal!
John Singleton, the founder of The Progrm, is known for training elite athletes, including many of Europe’s top CrossFit Games competitors. With a Master’s degree in Osteopathy, John combines science-based programming with a focus on performance and recovery. Based in Mallorca, Spain, he leads a global community dedicated to helping athletes optimize performance and longevity in the sport.

.avif)