The Pull up tutorial
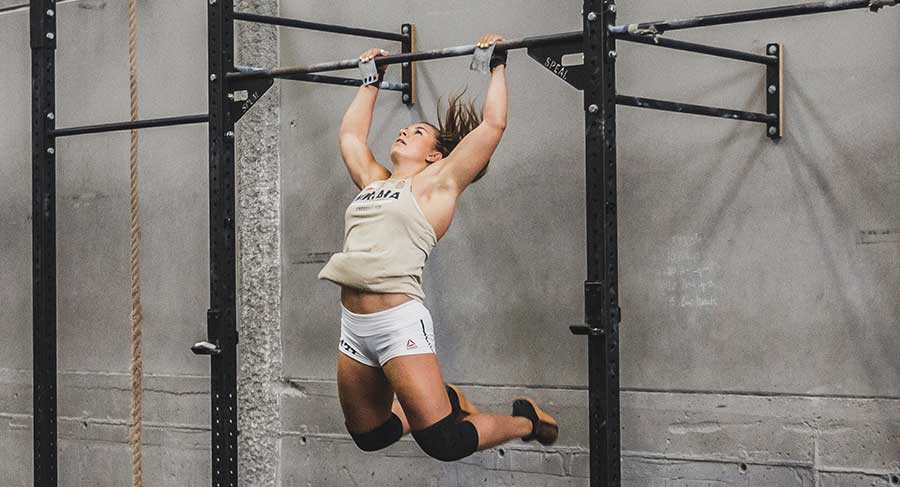
Pull-ups are a fundamental exercise both in the in the world of CrossFit and in fitness. Perfecting this iconic movement can be a formidable task for many athletes as it requires strength and coordination. In this tutorial, we'll get into the details of proper form, address common mistakes to avoid, and share progressive exercises that will build the necessary strength and technique.
What is a Pull Up?
It’s most basic definition describes it as “a pulling motion that starts with the athlete hanging with an overhand grip from the bar and with his arms fully extended, they complete the movement by pulling themselves upwards and bringing their chin over the bar”.
Different Pull Up variations
It is actually common in exercise terminology to refer to the “conventional” Pull Up, which relies solely on upper body strength, as a “Strict Pull Up”.
In CrossFit however, we also have the kipping Pull Up, the Butterfly Pull Up and the chest to bar.
Sounds a little messy?
This chart should make it much easier to understand:
| Variation | Key points | Muscles recruited | Common use |
| Strict Pull Up aka: Pull Up | Upper body strength bias, hips are locked. Chin over the bar. | Upper body dominant: Lats, biceps, shoulders, core | Increasing pulling strength over multiple domains and hypertrophy |
| Kipping Pull Up aka: CrossFit Pull Up | Utilizes drive from the hips and elastic rebound from the hollow-arch. Chin over the bar. | Upper + Lower body: Lats, biceps, shoulders, core glutes, quads | Commonly used as an introduction to CrossFit gymnastics |
| Butterfly Pull Up aka: Butterfly | Arguably requires less strength and more coordination than the previous versions. Chin over the bar. | Upper + Lower body: Lats, biceps, shoulders, core glutes, quads. More stress on anterior shoulder. | Used by more experienced CF athletes during workouts. |
| Chest to bar aka: C2B | The extra range of motion for the Chest to touch the bar requires more strength especially in the lats. Chest to bar. | Muscles recruited are the same as in the Pull Up variations BUT exertion and muscle recruitment is superior. | A more advanced version of the above. |
A common variation of the pull up is the Chin Up which requires an underhand/supine grip (palms facing towards you).
Kipping Pull Up technique
The kipping Pull Up is the first stepping stone into the more complex and dynamic gymnastics movements in CrossFit. It looks like this:
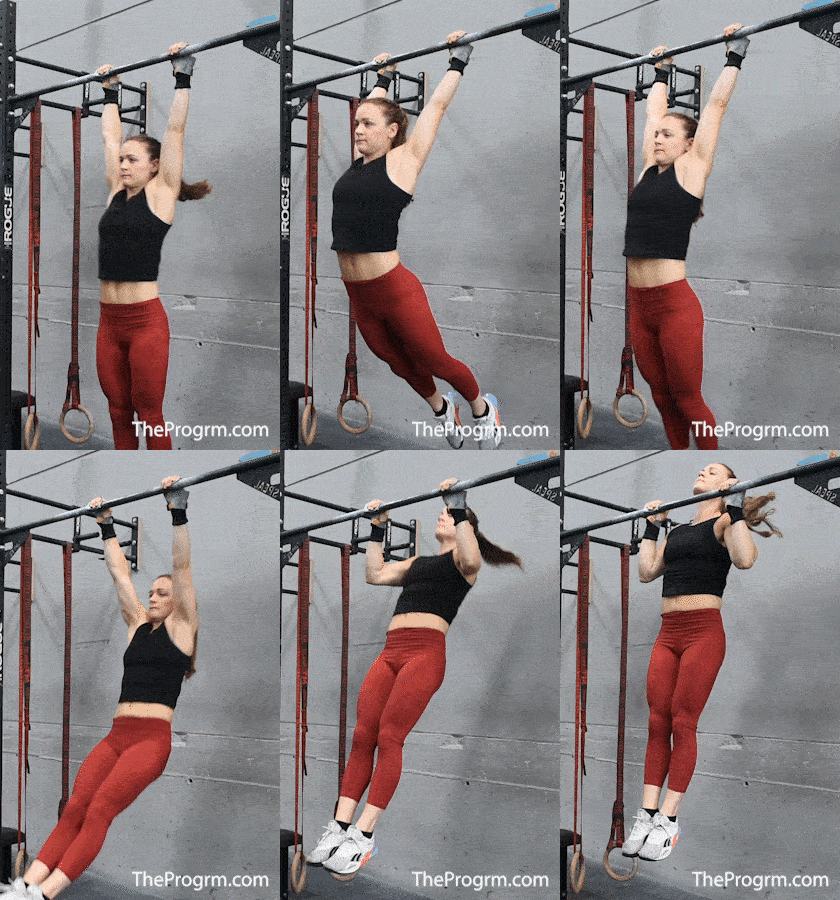
The Breakdown: While hanging from the bar, the athlete goes through the arch and hollow positions to gather momentum. She then extends her hips while pulls propelling herself upwards and towards the bar.
The rep is complete when the chin is over the bar.
Kipping Pull Up drills
The kipping pull up is all about using momentum and levers to help pull yourself up.
It allows athletes with less upper body strength to string together multiple reps of Pull Ups during a workout.
The most useful drills you can practice to build up to a kipping Pull Up are:
- Hollow rocks: laying on the ground facing upwards arms locked and reaching over your head. Engage you abs lifting both your legs and shoulders off the floor. This is a hollow hold. When maintaining this position make sure your lower back is always in contact with the ground. To progress to hollow rocks simply slightly reach upwards to give yourself some momentum and start rocking while maintaining a hollow position.
- Arch hold: laying on the ground face down with your arms locked reaching over your head engage your lower back to lift you legs and chest off the floor. Ideally only your abdomen should be in contact with the ground.
- Hanging arch hollow rocks: hanging from a bar in a hollow position kick your feet behind you while engaging your scapular muscles to pull your head forward and through your shoulders. You are now in the arch position, keep your core and back muscles engaged and stay tight! At the end range of your arch as you cannot move your upper body any further over the bar you will start feeling a pulling effect dragging you backwards. It’s simply an elastic rebound response generated by your muscles, utilize it to pull yourself backwards and into the hollow position. As you move back keep your lats engaged focusing on pushing down slightly on the bar.
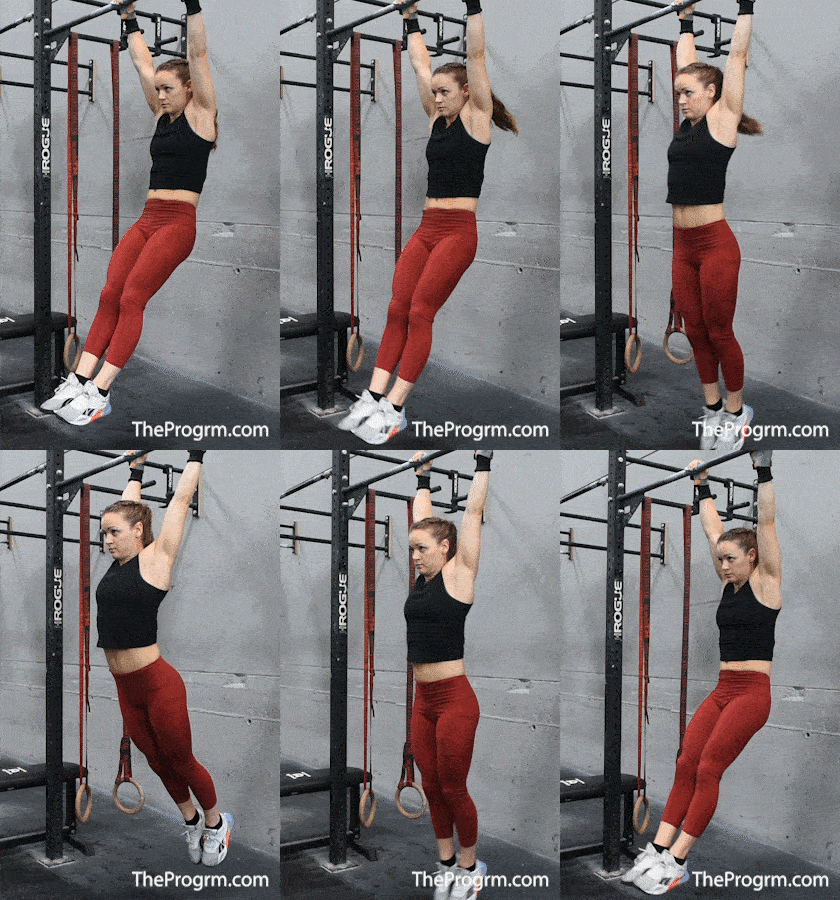
Because of it’s very intuitive nature, it is relatively easy for athletes with sufficient strength to learn the movement. We actually recommend you prioritize strengthening your upper body (especially your shoulders) and core over practicing these drills.
Making sure you are strong enough and have sufficient shoulder mobility will exponentially lower your chances of hurting yourself and will also set you up for success in learning this skill.
Butterfly Pull Up technique
The Butterfly Pull Up is definitely one of the most sought after movements in CrossFit but it’s also much more dependent on technique and coordination.
Like the kipping Pull Up it requires sufficient strict strength: we always recommend being able to perform Strict Pull Ups before moving on to Butterfly, because it's high impact and can be hard on shoulders and hands.
That said, this variation allows you to perform more reps in less time and the key is actually in the descent from the top position of the Pull Up.
In a conventional kipping Pull Up you would push yourself back and away from the bar in order to then achieve a big and powerful arch in the bottom position.
On the other hand the Butterfly technique requires the athlete to essentially pull themselves directly into the arch position as they come down from the previous rep.
This cuts on the “transition” time but it can be very tricky to learn and to understand the correct timing necessary to string multiple reps together.
Learning Butterfly Pull ups
Want to master one of the most coveted exercises in CrossFit? Check out our video tutorial below:
Butterfly Pull Up drills
- Eccentric Butterfly Pull Up: not only a drill but also a strengthening movement for the shoulders. It will allow you to understand where your body needs to be spatially in the descent. From the top position of the Pull Up (arms bent, chin over the bar, body in a hollow hold) start a controlled descent. As you move downwards use your scapular muscles to pull yourself forward so that your head goes through your shoulders and is already “in front” of the spatial line of the bar. As you do so start assuming an arch position,the rep is complete at the bottom of the Pull Up when your arms are locked out.
- Rhythm Drill / One legged Butterfly Pull Ups
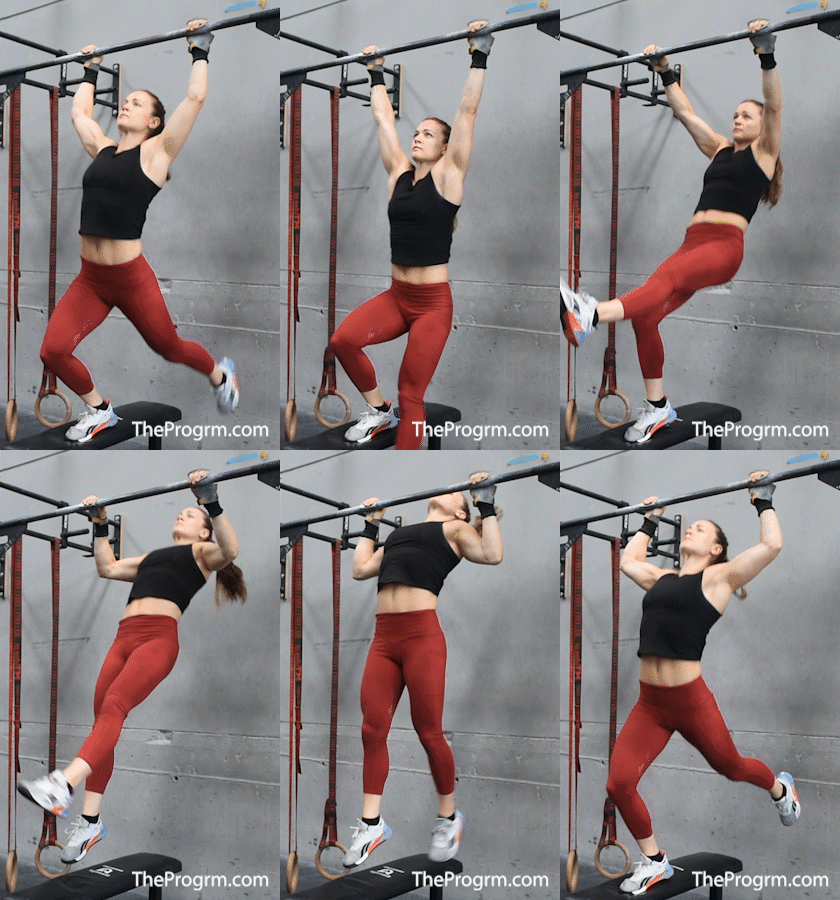
- Rep pyramid: making sure each sets starts and ends in the hollow position. Usually the number scheme is 1-2-3-4-5
Chest to bar Pull Ups technique (Butterfly variation)
In essence the chest to bar pull up is just a more explosive pull up.
In the strict variation a stronger and faster pull will allow you to get your chest to touch the bar. In the kipping versions we rely more on the explosiveness of the hips.
For some athletes how wide their grip is can also be a crucial difference from the standard Pull Up.
Overall if you have technically sound Butterfly Pull Ups, plus multiple reps of strict Pull Ups, transitioning to chest to bars comes down to practice and understanding the correct timing needed.
Chest to bar Pull Ups drills
- Chest to bar hold: This is a hard but crucial drill, as it develops the strength needed to attain the full range of motion.
- Rhythm Drill / One legged Butterfly Pull Ups: Exactly the same as the Butterfly however will develop the coordination needed for the chest to bar version.
Max pull ups in one minute
1 minute max pull ups is a common challenge in CrossFit. In this video Jacqueline Dahlstrom hits the challenge wearing a weight vest.
In Summary
So now you know the difference between all of the pull up variations and their uses.
It is key to understand that learning these movements is a lot like learning how to ride a bike.
At first it might seem almost impossible to grasp what exactly you're supposed to do, but once you understand the movement patterns and they will become second nature.
That’s why we encourage focusing on your foundation: mobility and strength.
When you develop both and couple them with the right drills, you’ll avoid developing wrong movement patterns that you’ll have to correct further on as well as potential for injury.
If you still are not sure how to get started or you feel like you need more support and attention towards your gymnastics skills, you can check out our specific courses for pull-ups and other skills.


